
CAN-SPAM and similar anti-spam regulations require commercial emails to include a valid physical mailing address. This article explains how to enable the physical address footer, use your business address by default, and optionally override it with a custom address all without changing your main business profile.
Note: This feature is supported for Link+ (Link+) Email only.
Table of Contents1Overview & Availability2How to Enable the Physical Address Footer3Using a Custom Address Override4Warning: Sending Without a Physical Address5Frequently Asked Questions1Overview & Availability
Laws like CAN-SPAM (US), CASL (Canada), and GDPR (EU) require commercial emails to include a valid physical postal address. Failing to include one can result in complaints, deliverability issues, or regulatory penalties.
The Physical Address in Email Footer setting lets sub-accounts automatically append a compliant postal address to every outbound email without manually editing each template.
| Attribute | Details |
|---|---|
| Supported Email Provider | Link+ (Link+) Email only |
| Access Level | Sub-account settings |
| Default Address Source | Business Physical Address (from Business Profile) |
| Custom Address | Optional override — does not change the main Business Profile |
How to Enable the Physical Address Footer
Once enabled, the footer address is automatically appended to every outbound email — no template changes required.
Step 1Log in to the sub-accountMake sure you are inside the sub-account where LeadConnector Email is configured as the email sending provider.
Step 2Navigate to Settings → Business ProfileFrom the left-hand menu, go to Settings, then click Business Profile.
Step 3Find the General sectionScroll down to the General section on the Business Profile page. You will see a list of compliance toggles.
Step 4Enable "Make emails compliant by adding a Physical Address in the email footer"Check the toggle/checkbox labelled Make emails compliant by adding a Physical Address in the email footer. The address saved in your Business Physical Address settings will be pre-populated automatically and will appear in the footer of every outgoing email.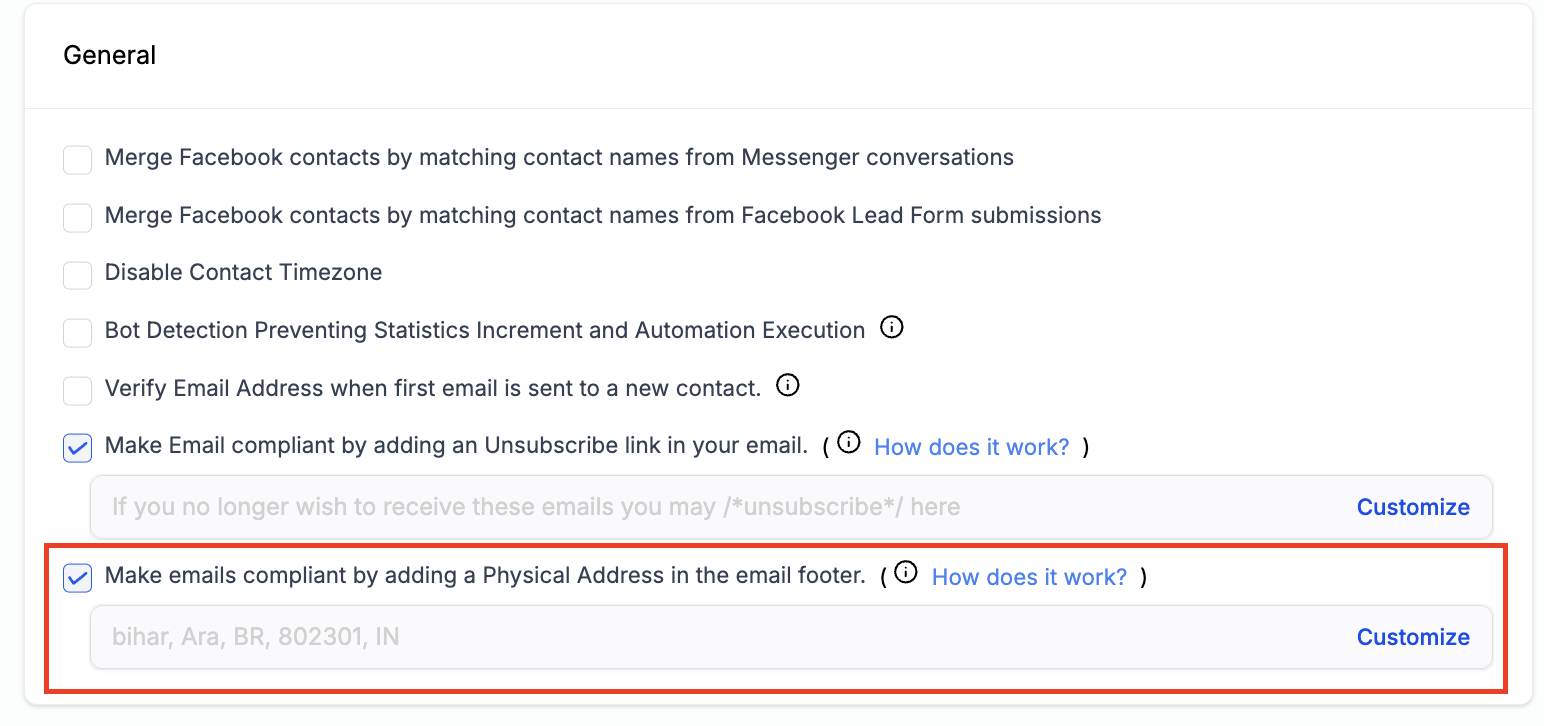
No further configuration is needed. The footer address is applied out of the box once the checkbox is enabled. You can see a preview of the address that will appear (e.g. 400 N Saint Paul St STE 980, Dallas, 75201) directly in the settings panel.
3Using a Custom Address Override
If you want the email footer to show a different address — for example, a P.O. box, virtual mailbox, or alternate office location — you can override the default business address without changing your main Business Profile.
Step 1Click "Customize"After enabling the footer toggle, click the Customize link shown next to the address preview. An inline address form will expand.
Step 2Fill in the custom address fieldsThe form includes the following required fields:
- Street Address
- City
- State / Prov / Region
- Postal / Zip Code
- Country
Click Save Address to apply the override. This custom address is saved independently and does not overwrite the main Business Physical Address in your Business Profile settings.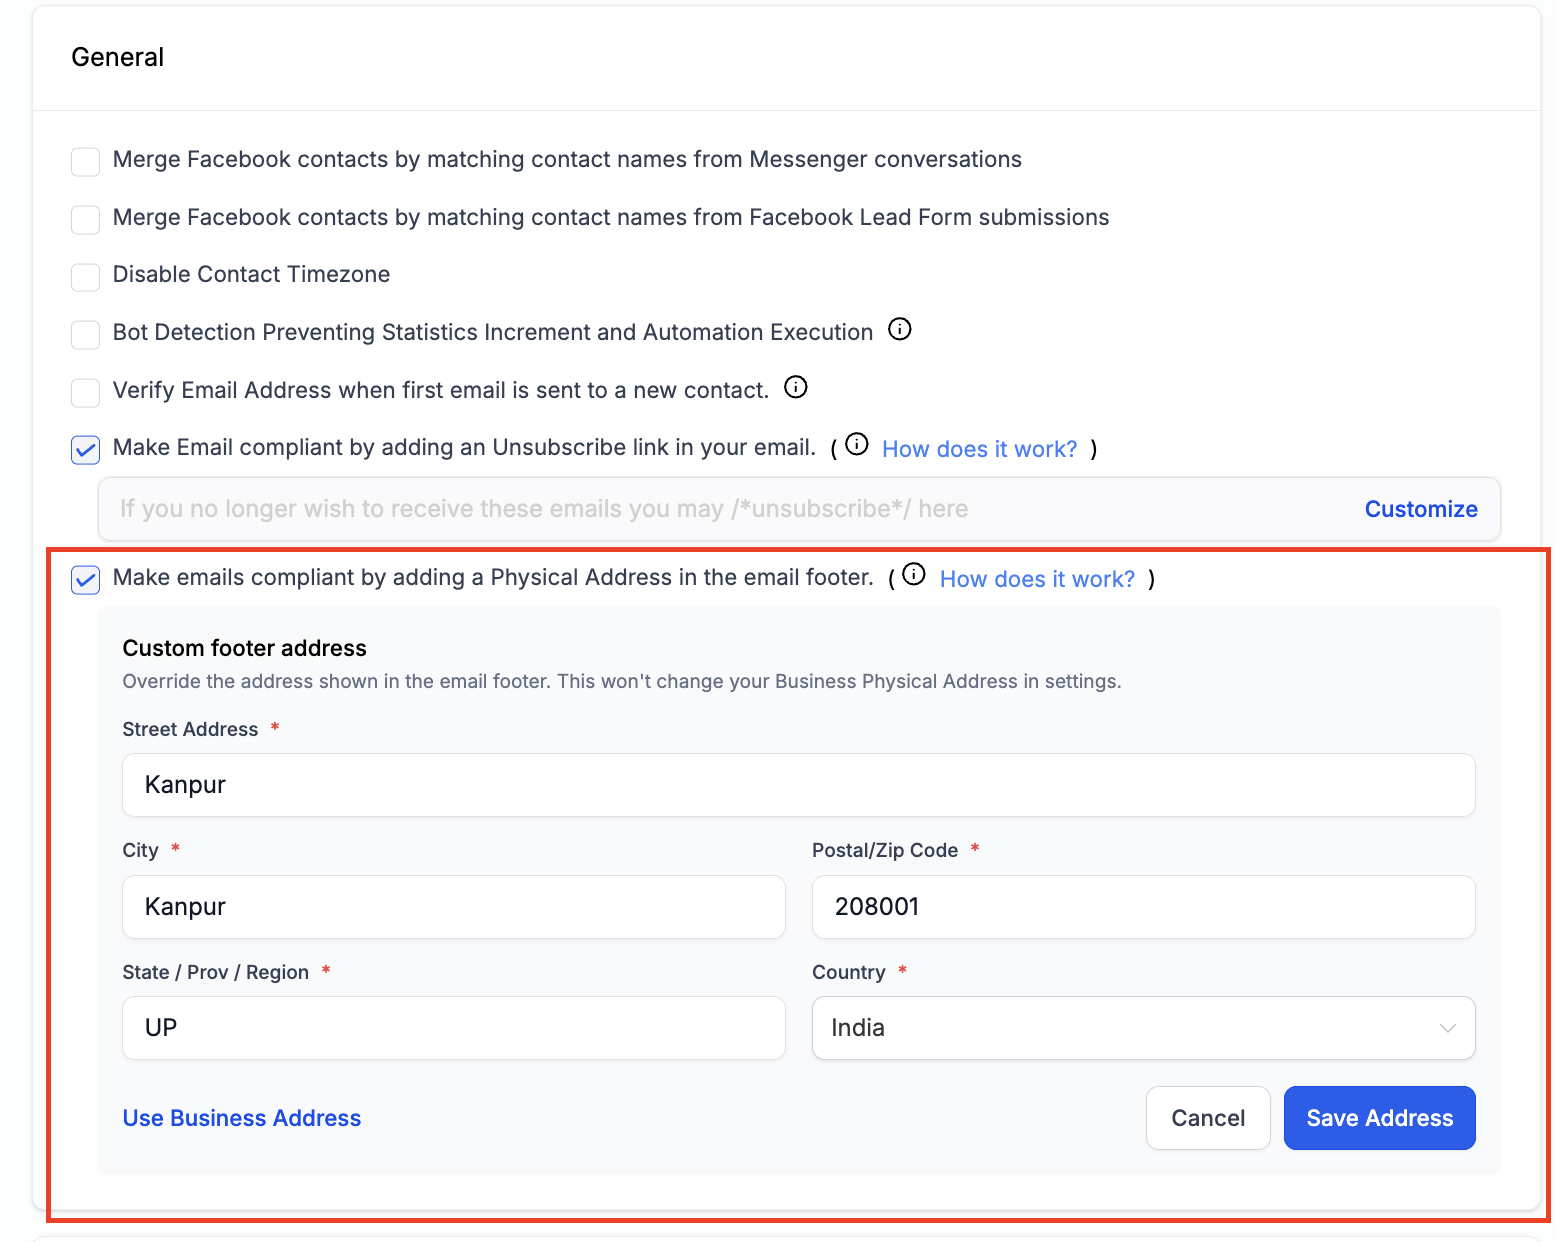
To revert to the default business address at any time, click Use Business Address at the bottom of the custom address form. This clears the override and restores the address pulled from your Business Profile.
4Warning: Sending Without a Physical Address
If you leave the checkbox unchecked and choose not to include a physical address in your email footer, the following warning message will appear inline in your settings:
Warning⚠️ Sending commercial emails without a physical address may violate CAN-SPAM and other anti-spam regulations. We recommend including an address to stay compliant.
NoteThis warning is non-blocking — you can still save your settings and send emails without a physical address. However, we strongly recommend enabling this setting to remain compliant and protect your sender reputation.
5