
Are you looking for an easy way to connect with your website visitors and convert them into customers? Webchat for Link+ is the perfect solution for you!
In this article, we'll walk you through the steps to start with Link+ Webchat for Wix.
Covered in this article:
How to obtain the embed code for web chat for the website:
Here are detailed steps on how to add a custom chat widget to a Wix website using different methods.
How to obtain the embed code for web chat for the website:
Copy the embed code from Sites > Chat Widget > Get Code
Here are detailed steps on how to add a custom chat widget to a Wix website using different methods:
Method 1:
- Log in to your Wix account and navigate to the website's dashboard.
- Click "Settings" in the left menu, then select "Custom Code" under the "Advanced" tab.

- Click "Add Custom Code" in the section.
- Paste the code snippet in "Code Settings" within the pop-up window.
- Configure options:
- Name: Enter a name for your code
- Add Code to Pages: Choose "All Pages" and select "Load code once."
- Place Code In: Choose "Head"
- Click "Apply" to save changes.

- The widget will now appear on every page of your Wix site.
Method 2:
- Sign in to your Wix account and launch Wix Editor. Click Edit Site from the Dashboard.
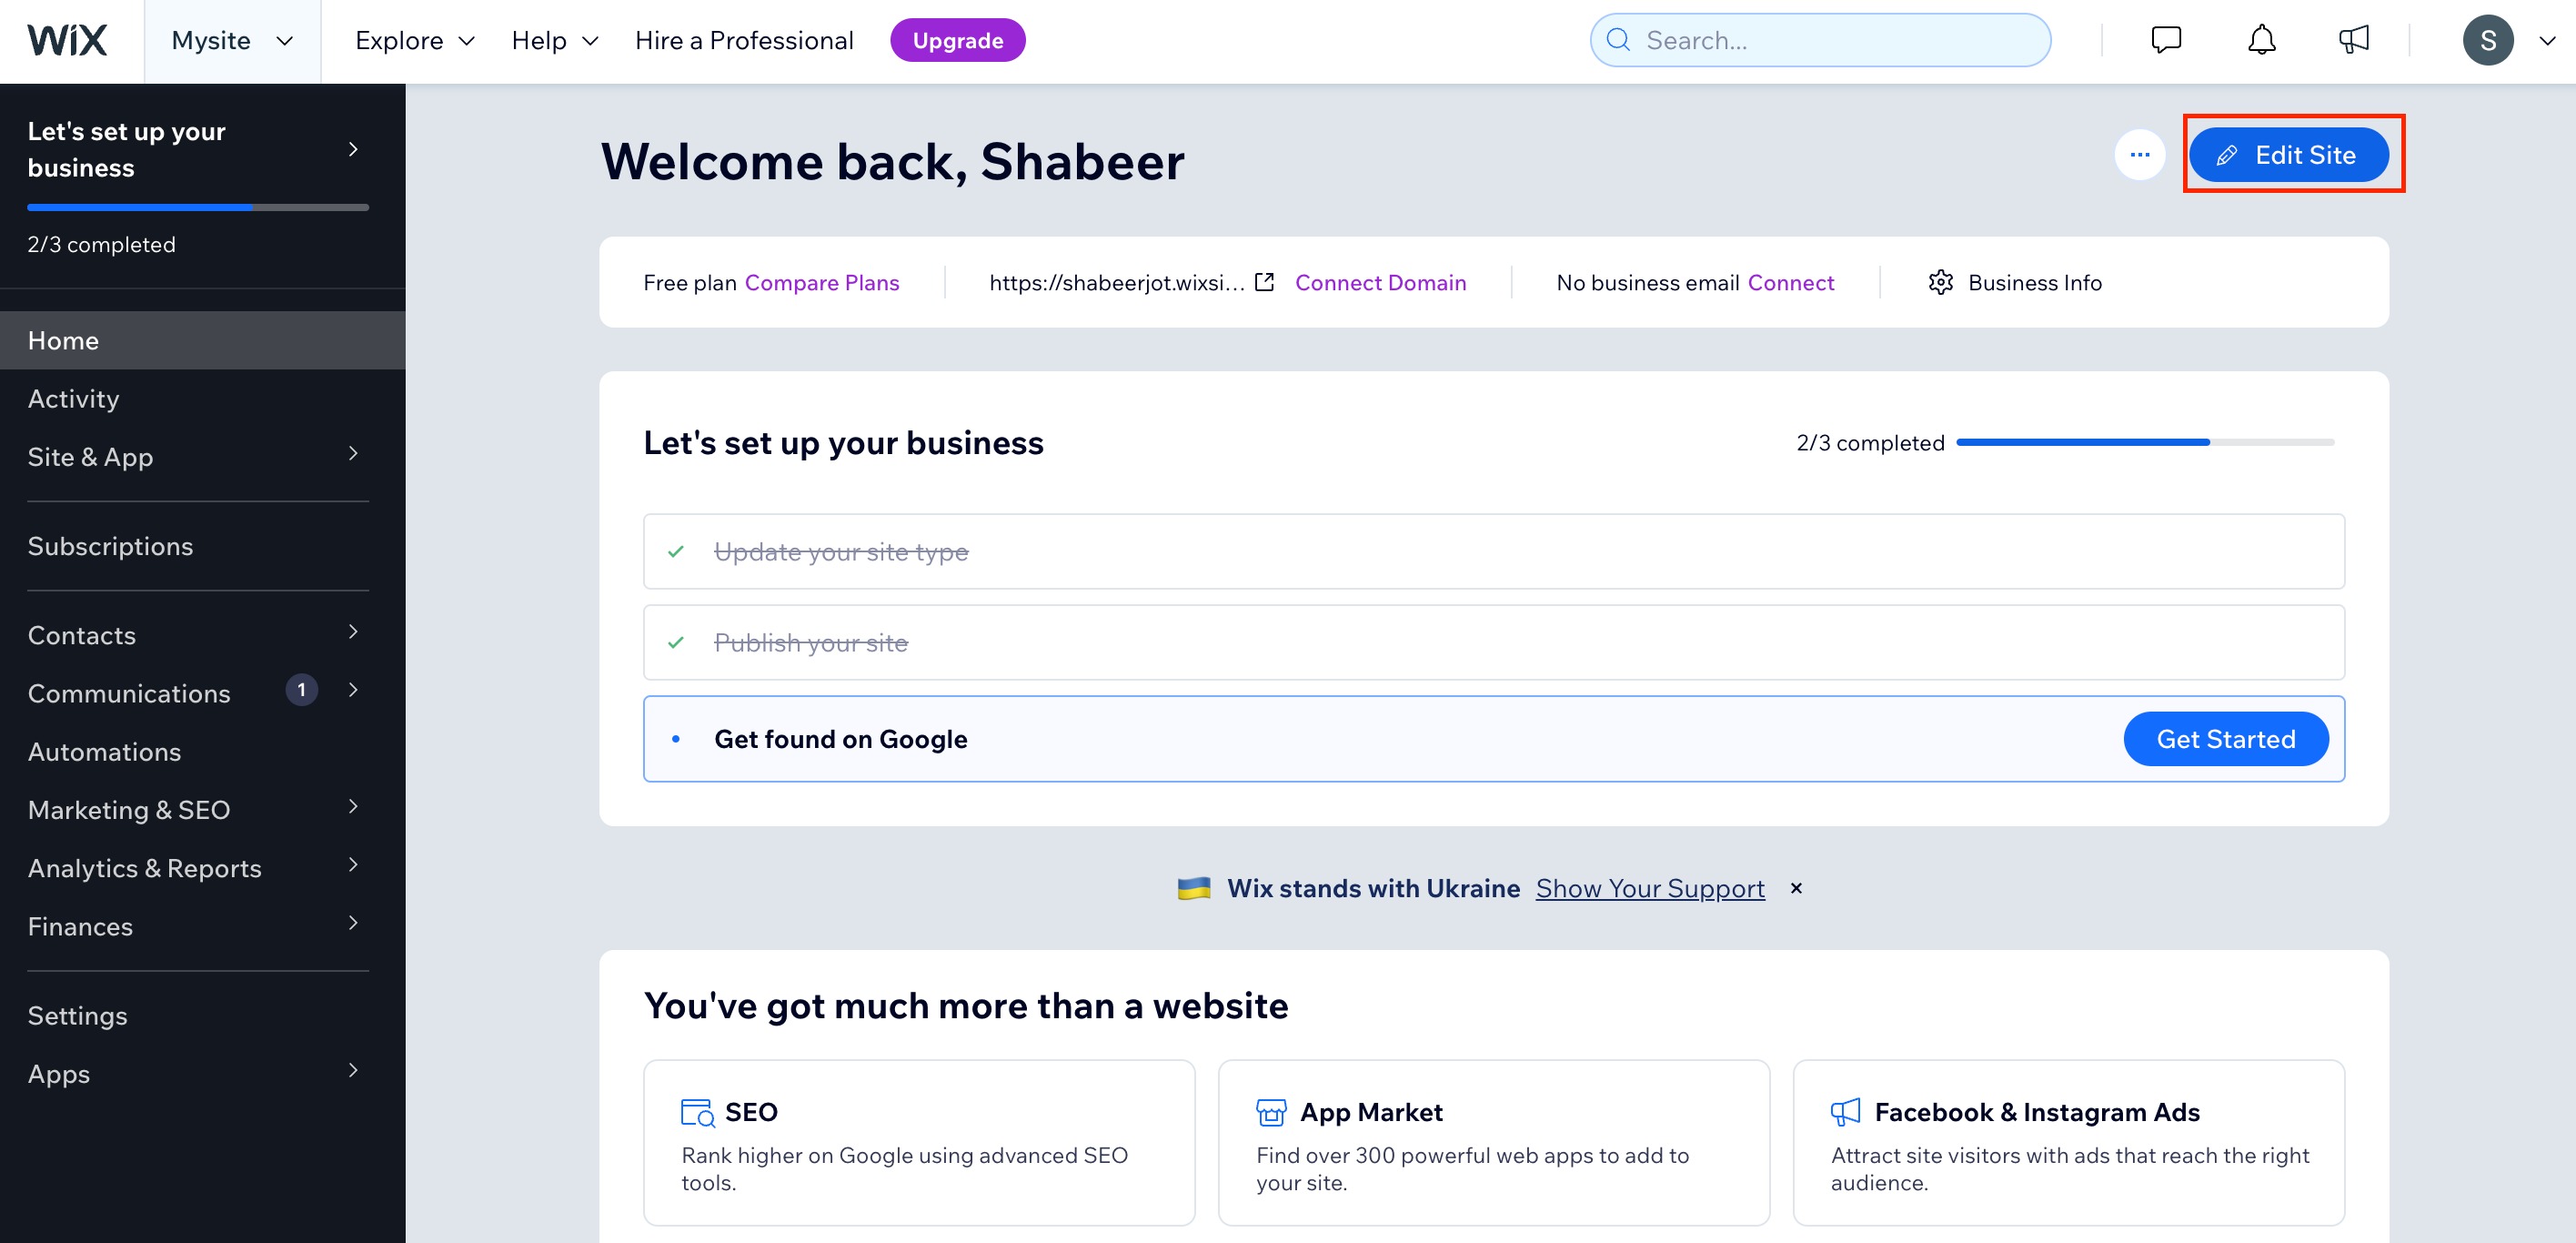
- Click the plus (+) icon in the left-side menu to access "Add Elements."
- Choose "Embed" from the left sidebar menu.
- Select "Embed HTML" under "Popular Embeds".

- Click on "Code" in the new HTML box that appears.
- Paste the widget code into the text field and press "Update."

- Close the "HTML Settings" box.
- The widget will now be visible in the HTML box on your page.